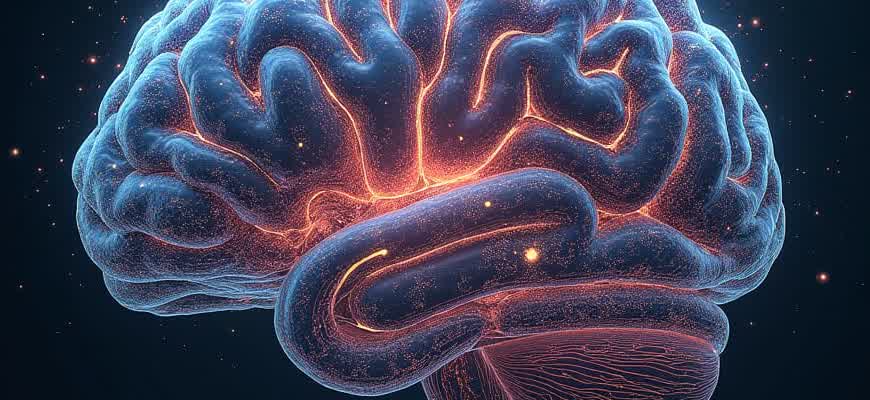
How to Create Ai Video with My Face
Creating an AI-generated video with your face involves several key steps to ensure high-quality and realistic results. The process typically starts with capturing a clear and well-lit image or video of your face. This will be used by AI models to map and replicate your facial features and expressions in the final video. Below is a step-by-step guide to help you create an AI video seamlessly.
Steps to Generate an AI Video:
- Step 1: Collect quality data of your face (photos or video clips).
- Step 2: Choose a video AI tool that allows facial mapping.
- Step 3: Upload your data to the selected platform.
- Step 4: Customize the video content (such as script, background, and actions).
- Step 5: Render and export the video once satisfied with the results.
Remember that higher quality images or videos of your face will result in a more accurate AI model, improving the final video outcome.
Key Considerations for a Successful AI Video:
| Consideration | Explanation |
|---|---|
| Lighting | Ensure that your face is well-lit to capture clear and consistent features. |
| Expression | Vary your facial expressions to provide the AI model with diverse data for more dynamic video creation. |
| Resolution | Use high-resolution images or videos to avoid pixelation in the generated video. |
How to Generate AI Videos Using Your Own Face
Creating a video using your own face and AI technology is becoming an increasingly popular tool for content creation. Whether you're looking to create personalized avatars, videos for social media, or simply experiment with AI-generated visuals, the process can be streamlined with the right tools and techniques. By using deep learning models and facial recognition algorithms, you can replicate your face in videos, making it appear as though you're speaking or acting in real-time, all without the need for extensive filming equipment.
This guide walks you through the steps of creating AI videos that feature your face. The process involves capturing your facial data, using it to train an AI model, and generating video content based on pre-scripted audio or actions. The final result can be as realistic or creative as you desire, depending on the technology and software you choose to use.
Steps to Create an AI Video with Your Face
- Collect Face Data: Use a camera or smartphone to capture clear images or video of your face from various angles. High-quality lighting and a neutral background can improve the accuracy of the AI model.
- Choose AI Software: There are several tools available for generating videos with your face. Some popular options include DeepFaceLab, Reface, and Synthesia. Each platform has different features and capabilities, so select one that aligns with your goals.
- Upload Data: After capturing your face data, upload it to the chosen AI platform. The software will process the data and create a model of your face, often requiring you to train the model to improve the accuracy.
- Create Video Content: Once the model is ready, you can input audio, script, or other video elements that the AI will use to generate the final video. The AI will map your face to the content, allowing you to appear in the video without filming yourself directly.
- Refine the Output: Review the generated video and make adjustments as needed. Some tools allow for fine-tuning of facial expressions, lighting, and other visual effects.
Important Tips
Privacy Concerns: Always be mindful of privacy when using AI to create videos with your face. Avoid sharing sensitive facial data on platforms without proper security measures.
Comparison of Popular AI Video Tools
| Tool | Key Features | Best For |
|---|---|---|
| DeepFaceLab | High-quality face swapping, deep learning algorithms | Advanced users, custom AI models |
| Reface | Easy-to-use, real-time face swapping | Quick videos for social media, fun content |
| Synthesia | Text-to-speech, AI-generated avatars, corporate use | Corporate training videos, personalized presentations |
Conclusion
Creating an AI video with your face is a straightforward process when using the right tools. Whether you're creating professional content or simply experimenting, understanding the steps and using the appropriate software will ensure a high-quality output. Always consider privacy and ethical implications when working with AI and your personal data.
Choosing the Right AI Tool for Face Recognition
When selecting an AI tool for face recognition in video creation, it's essential to consider various factors that directly impact the quality and accuracy of the final product. Face recognition technology can significantly improve your video by accurately tracking and animating your face, making it look natural and lifelike. Understanding the available options will help you choose the right tool based on your needs, whether for professional or personal use.
There are a variety of AI-based face recognition tools, each with its own features and functionalities. The effectiveness of these tools depends on your intended use, the level of customization you require, and the quality of output you expect. Here are some key considerations to help you choose the best option for your project.
Key Considerations When Choosing a Face Recognition AI Tool
- Accuracy of Facial Recognition: Ensure the tool uses advanced algorithms that provide high recognition accuracy in various lighting and angles.
- Integration with Video Editing Software: Choose a tool that integrates seamlessly with popular video editing platforms.
- Customization Options: Some tools allow you to fine-tune facial expressions and gestures, while others focus purely on automated recognition.
- Real-Time Processing: If you're working on live video or need real-time feedback, make sure the tool supports this functionality.
Top AI Face Recognition Tools
- DeepFaceLab – Known for its deep learning models and high-quality face swapping features, ideal for professionals.
- Reface – A user-friendly mobile app that allows for quick face swapping with minimal effort.
- Avatarify – Great for creating lifelike avatars using your facial features in real-time.
Important Features to Look For
| Feature | Description |
|---|---|
| Facial Tracking | Ability to track your face in real-time, even with head movements or different facial expressions. |
| Expression Mapping | Mapping your facial expressions accurately to control avatars or other animated characters. |
| Resolution Support | Support for high-resolution outputs that ensure a professional-looking result. |
When working with face recognition tools, always test them with your own footage to ensure the software meets your specific requirements, especially when it comes to video resolution and facial movement accuracy.
Setting Up Your Face Data for AI Video Creation
Before you can create a video featuring your face using AI technology, the first crucial step is to collect and prepare accurate data of your face. This data serves as the foundation for the AI to map your facial features and replicate your expressions and movements. The quality and diversity of the data you provide will directly influence the realism and accuracy of the final result. The better the data, the more lifelike and personalized the video will appear.
To ensure that your AI video is realistic, follow the steps below to gather and set up your face data properly. The process involves capturing clear images or videos of your face from different angles, lighting conditions, and expressions. This will allow the AI system to understand your face's shape, proportions, and movements, helping it to recreate them more accurately in a virtual environment.
Step-by-Step Guide to Face Data Collection
- Capture High-Quality Images: Take clear, well-lit photos of your face from various angles, including front, side, and diagonal views.
- Ensure Diverse Expressions: Include different facial expressions such as smiling, frowning, and neutral to help the AI understand your dynamic range.
- Maintain Consistent Lighting: Use consistent lighting to avoid shadows or highlights that could distort facial features.
- Record Video (Optional): Some AI systems perform better with videos rather than still images, as they can capture more subtle facial movements.
Data Preparation and Upload
Once you've collected the necessary images or videos, the next step is to upload your data into the AI platform. Ensure that the platform you are using supports the format and quality of the images or videos you've captured.
Make sure to follow the specific guidelines provided by the AI software to avoid any issues with data processing.
Required Data Format
| Data Type | File Format | Resolution |
|---|---|---|
| Images | JPG, PNG | 3000x3000 pixels or higher |
| Videos | MP4, AVI | 1080p or higher |
By following these steps and ensuring the quality of your data, you can provide the AI system with the best possible foundation for creating an accurate and high-quality video of your face.
How to Record and Capture Your Face for AI Modeling
Capturing high-quality facial data is crucial when creating a personalized AI model. This process involves taking precise and well-lit images or videos that can later be used to train the AI. The goal is to ensure that the model can learn to replicate your facial expressions, emotions, and gestures accurately. Below are the key steps and considerations for recording your face effectively.
Good lighting and consistent angles play a significant role in obtaining clear and usable data. The more varied and detailed the images, the better your AI model will perform. Follow the guidelines below to optimize your facial data capture process.
Steps for Recording Your Face
- Choose the Right Environment: Ensure the lighting is even, without harsh shadows. Natural daylight or soft artificial lights work best.
- Set Up Your Camera: Position the camera at eye level. Use a tripod or stable surface to avoid shaking during the recording.
- Keep Your Face Centered: Align your face in the center of the frame. Avoid turning your head too much; slight movements are fine.
- Record Multiple Angles: Capture images or video from various angles, including frontal, side, and 45-degree views.
- Use High-Resolution Settings: Choose the highest possible resolution to ensure the facial details are clear and sharp.
Important Tips to Improve Data Quality
- Expression Variety: Capture different facial expressions, including happy, sad, surprised, and neutral, to create a diverse dataset.
- Facial Markers: Use facial recognition markers or software that can track key facial features (eyes, nose, mouth) to help the AI model understand your face better.
- Avoid Obstructions: Make sure nothing covers your face, like hats, glasses, or other accessories, that could interfere with the model's learning.
Important: Consistency is key. Try to use the same lighting, camera settings, and background across all recordings for the best results.
Data Quality Check
After capturing the images or video, review the footage for clarity and accuracy. It is essential that the AI model can detect fine details like your eyes, lips, and skin tone. If any of these areas are blurry or unclear, consider re-recording those segments.
Summary Table of Face Recording Best Practices
| Aspect | Recommendation |
|---|---|
| Lighting | Even, soft lighting with no shadows |
| Camera Position | Eye level, stable setup |
| Face Position | Centered and straight-on with slight movements |
| Expression Variety | Capture a range of emotions |
| Resolution | High-resolution images or video |
Optimizing Lighting and Environment for Accurate Face Detection
When capturing a video for AI face detection, lighting and the environment play a crucial role in ensuring high-quality, accurate results. Proper lighting reduces shadows, minimizes distortions, and ensures that facial features are clearly visible to AI algorithms. In addition, the environment must be controlled to avoid factors that could interfere with face recognition, such as reflective surfaces or cluttered backgrounds.
By adjusting the lighting and environment, you enhance the AI's ability to recognize and replicate your facial features more effectively. Below are essential tips for achieving optimal conditions for AI face detection.
Lighting Tips for Face Detection
- Natural Lighting: Whenever possible, use soft natural light, such as daylight through a window, to illuminate your face. This provides even lighting without harsh shadows.
- Artificial Lighting: Use soft light sources like diffused LED panels or ring lights to avoid direct, harsh light that can create strong shadows.
- Light Positioning: Position the light source at eye level, in front of you, to prevent shadows under the chin, eyes, and nose.
- Avoid Overhead Lighting: Overhead lights can cause shadows on the face that distort key features. Aim for lighting that’s even and diffused.
Environmental Factors to Consider
- Background: Choose a simple, uncluttered background that contrasts with your skin tone. Avoid backgrounds that could cause the AI system to misinterpret or blend the face with the surroundings.
- Reflective Surfaces: Eliminate mirrors or shiny surfaces near the camera that can create unwanted reflections or glares, interfering with the face detection process.
- Distance from Camera: Maintain a reasonable distance from the camera, ideally around 2-3 feet, to ensure your face is clearly visible and in focus.
- Camera Angle: Keep the camera at eye level. Avoid angles that may distort your facial features or cause asymmetry.
Quick Comparison of Lighting Options
| Lighting Type | Advantages | Disadvantages |
|---|---|---|
| Natural Light | Soft, even lighting; free | Limited by time of day; difficult to control |
| LED Ring Light | Easy to set up; consistent lighting | May cause overexposure; needs power source |
| Softbox Lighting | Provides diffuse, balanced lighting | Can be bulky; requires setup |
To achieve optimal AI face detection, ensure you have consistent lighting and an environment free from distractions or distortions.
Editing and Customizing AI-Generated Videos with Your Face
Once the AI model has generated a video using your face, the next step is to refine the output to achieve the desired look and feel. This process involves making adjustments to both the visual and audio aspects of the video, ensuring that the final result aligns with your vision. The ability to manipulate details such as expressions, background, and even speech patterns enhances the flexibility of AI-generated content.
Customization options are usually available through specialized software or platforms, which offer an array of editing tools. These tools allow you to tweak various aspects of the video, from facial expressions to lighting, and even adjust the audio tracks to match your voice or tone. Below are the key steps and tools you can use to refine your AI video.
Key Steps for Customizing Your AI Video
- Facial Expression Adjustment: Some platforms allow you to modify the facial expressions in the video. You can choose different moods such as happiness, surprise, or anger.
- Voice Synchronization: Syncing your voice with the generated content ensures a more natural flow. You can record or upload your own voiceover.
- Background and Lighting Modification: Customize the scene to match the tone or setting you're aiming for, adjusting lighting, background elements, and even camera angles.
Editing Tools to Enhance Your Video
- Video Editing Software: Tools like Adobe Premiere Pro or Final Cut Pro allow for advanced customization of both video and audio, enabling seamless integration of your face.
- AI Platforms: Some platforms, like DeepBrain or Synthesia, offer built-in options for tweaking the facial movements, gestures, and voice to make the content more lifelike.
- Speech Enhancement Tools: Apps like Descript help refine speech patterns, remove background noise, and adjust tone, making the audio more aligned with your natural voice.
Important Considerations
Always check the ethical and legal implications of using AI-generated content with your face, especially regarding consent, intellectual property, and privacy concerns.
Table: Comparison of Editing Tools
| Tool | Features | Platform |
|---|---|---|
| Adobe Premiere Pro | Advanced editing, multi-layered audio, visual effects | Windows, macOS |
| Synthesia | Pre-built AI avatars, facial expression control, voice sync | Cloud-based |
| Descript | Speech editing, text-to-speech, audio enhancements | Windows, macOS |
Integrating Voice and Speech Synthesis with AI Video
To enhance the realism of AI-generated videos, incorporating realistic voice and speech synthesis is essential. This process allows for the creation of content that not only looks like the person it is mimicking but also sounds like them. By combining deep learning models for facial animation with advanced speech synthesis technologies, AI-generated videos can achieve a higher degree of authenticity, making them more believable to the audience.
Integrating voice into AI video production involves several stages, each crucial for seamless synchronization. These stages include voice cloning, speech synthesis, and lip-syncing to ensure that the generated speech matches the facial movements in the video. The result is a more immersive experience for the viewer, where the character in the video doesn't just look real, but also sounds and speaks like the original person.
Key Components of Speech Integration
- Voice Cloning: Creating an AI model that mimics the target's voice, based on recordings of their speech.
- Speech Synthesis: Using AI to generate natural-sounding speech from text, matching the voice clone’s tone and pitch.
- Lip Syncing: Adjusting facial animation to align with the generated speech, ensuring a fluid and realistic performance.
How It Works
- Collect audio samples of the subject’s voice to create a high-quality voice model.
- Use text-to-speech technology to generate speech in the desired voice, based on a script or input text.
- Apply facial animation techniques, synchronizing lip movements and expressions with the generated speech.
By combining voice cloning with advanced animation software, creators can produce videos where the AI-generated voice not only mimics the original tone and style but also adjusts to the video context dynamically.
Technical Breakdown
| Component | Description |
|---|---|
| Voice Cloning | Recreates the unique vocal traits of an individual using machine learning models. |
| Speech Synthesis | Converts text input into spoken words with natural prosody and tone. |
| Lip Syncing | Synchronizes facial expressions and lip movements to the generated speech. |
Exporting and Sharing Your AI-Generated Video
Once your AI-generated video is ready, it's time to export and share it with others. This step involves choosing the right file format, adjusting quality settings, and selecting the best method for sharing the content across various platforms. Understanding the export process ensures that your video maintains high quality while being easily accessible to your audience.
The export options may vary depending on the software or platform you use, but the general principles remain the same. Here, we’ll discuss the essential steps to take when preparing your AI video for sharing.
Exporting Your Video
Exporting involves saving your project into a format that can be viewed or uploaded across devices and platforms. Some of the most common video formats include:
- MP4: Widely supported and great for most platforms.
- AVI: Higher quality, but larger file sizes.
- MOV: Often used in professional video editing software.
Before exporting, consider the following parameters:
- Resolution: Choose an appropriate resolution for your video. Common options are 1080p and 4K.
- Frame Rate: Adjust the frame rate to match your content’s smoothness needs.
- Compression: Higher compression reduces the file size but may affect quality.
Sharing Your Video
Once exported, the next step is sharing your AI-generated video with your audience. Depending on your goals, there are several methods available:
- Social Media: Platforms like Instagram, YouTube, and Facebook support video uploads and offer large audiences.
- Cloud Storage: Use services like Google Drive or Dropbox for easy sharing and storage.
- Email: You can directly send your video through email for more personal distribution.
Tip: Ensure that the file size is optimized before sharing it, as large files might take longer to upload or exceed platform limitations.
Considerations for Quality
Quality is a critical factor in the success of your video, particularly if you aim for professional or commercial distribution. Here are some points to keep in mind:
| Aspect | Consideration |
|---|---|
| Audio | Ensure that the audio quality matches the video for a professional feel. |
| Resolution | Higher resolution is always better for clarity but can affect upload time. |